
Leaks, dirt, the previous owner’s bad taste… There are plenty of reasons to renovate your RV ceiling.
Whether it’s those dark stains that just won’t fade any further, no matter how hard you clean them, or repair work after a leaky roof, once you’ve decided to replace your camper ceiling, you really need to think things over carefully before you commit.
This can be a tricky job, get it right and it’ll look awesome, get it wrong and you may end up having to replace it all over again some time soon.
A few years back, I picked up a Winnebago at a bargain price. Only problem was the previous owners hadn’t taken that great care of the ceiling inside and I really, really dislike carpet ceilings. Especially stained carpet ceilings.
Stubborn stains that don’t come out after hours and hours of cleaning. I just couldn’t wait to tear it down and replace it with anything. So, down it came, leaving me with the dilemma of what to replace it with.
If you’re thinking of replacing your RV ceiling, I’ve listed some of the most popular camper ceiling materials below as well as a guide on how to pick one that’s appropriate for you. Be sure to check out my handy list of accessories at the end too, because if you get started without everything you need, the job can get pretty messy and you don’t want your ceiling literally caving in on you.
Plywood
Plywood is traditionally a popular choice for RV interiors. It is inexpensive, can be easily cut to size, readily available at any hardware store and can be painted to suit your decor.
A wooden ceiling also adds an element of coziness I find, although it can look dated depending upon your finish.
That said, you can paint it with a nice bright finish for a modern, airy living area.
If you’re thinking of opting for plywood, bear in mind that water and plywood are not a good mix. Double, triple check that any leaks have been 100% fixed before you even think of installing a plywood ceiling in your camper, all else all that hard work could literally be for nothing.
If you have any fire hazards be aware of the increased risks associated with a wooden ceiling.
Vinyl/PVC
PVC or vinyl tiles are a great choice for RV ceilings. They are extremely resistant.
Think about it, the amount of use that such a small space gets in comparison to a larger dwelling, especially if you’re living in your RV full-time.
PVC ceilings are waterproof, easy to clean and, generally speaking, fire resistant.
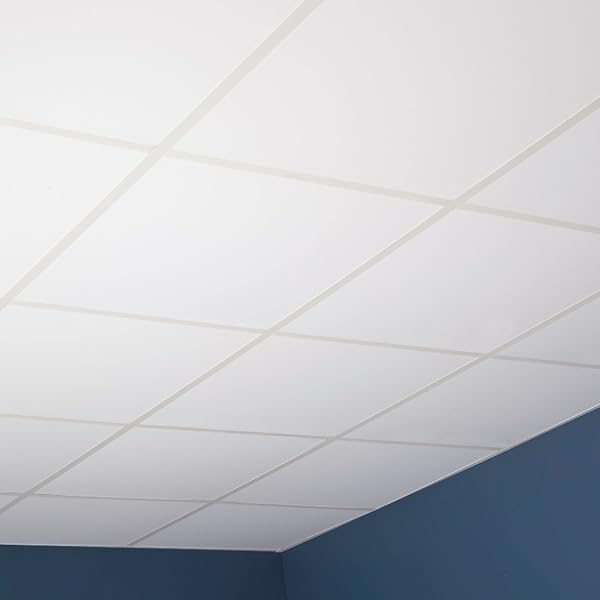
A friend of mine has recently finished his RV interior with these Genesis PVC tiles. I have to say, it looks amazing.
They are great for high humidity areas, like your bathroom and kitchenette area. I was originally pretty dubious, but I have to say the final result looks great and they’re waterproof, wipe clean and do not harbor odors. These particular tiles have the added bonus of being mold and mildew treated.
Fabric
As I stated earlier, I personally do not like fabric on ceilings, but that’s just my personal taste. In some RV remodels it can look good and I can just about see its appeal in the bedroom.
Yet no matter how good you may think your fabric ceiling will look, bear in mind that fabric ceilings are notoriously difficult to clean, harbor odors (do you really want to be smelling that fish supper well into next week?) and they will absorb any moisture.
That aside, fabric ceilings can add insulation, warm up the look of a room and are generally easy to install. There are always newer and better products available and while today’s range of fabric for RV ceilings has undoubtedly improved, I personally like a finish I can clean thoroughly with ease.
Metal
Metal ceiling coverings are gaining in popularity. They’re easy to install, simply nail up, they can be painted to suit your decor and they’re extremely hard wearing and durable.
I must admit, I initially kind of thought the idea was a little out there, but when I saw an RV living area ceiling fitted out with these Nail-Up Tin Ceiling Tiles, I was impressed with the finished result.
You can finish them to either bring out their natural beauty or use a colored paint that will enhance the shade of your furnishings. Of course, metal will not absorb any odors and once you’ve decided upon your finish, it is easy to clean with a quick wipe over from time to time.
If you’re having doubts, check this product out, it could be just what you’re looking for.
Insulation
Okay, so this isn’t a camper ceiling material.
I just wanted to take advantage of the occasion to remind you that while you’re replacing your RV ceiling, this is an ideal opportunity to add or upgrade your insulation.
As we all know, heat rises, so keep more heat in for longer and keep the cold out with new insulation. This will also save energy and keep your heating costs down. A win-win scenario.
What You Need to Consider When Choosing your RV Ceiling Material
To help you to make the right choice of ceiling material for your RV, I’ve come up with this list of considerations that it will help you to bear in mind while making your choice.
Okay, so you may have decided what you like looks-wise, but you need to make sure it’s the right choice for your circumstances.
While some materials will be suitable just about anywhere, others are more area specific. Consider the practicalities first, before deciding upon your finished look.
If possible ask friends and other RVers you meet about their experiences, this can give you valuable insights and help to save you both time and money.
Room
Some materials are more suited to certain rooms than others. While you can get away with just about anything in the bedroom, your choices for kitchen and bathroom ceilings will need more careful consideration.
You also need to consider whether or not you want the same finish in all of the parts of your RV, depending upon your set up and floor plan.
Waterproof
If you’re replacing the bathroom ceiling, you’re going to want a waterproof finish that goes without saying.
Also, don’t forget there’s a lot of water vapor released cooking, as well as odors. Waterproof finishes tend to be easy to clean and do not absorb odors.
Easy to Clean
Don’t replace a stained camper ceiling with another one that is equally impossible to clean! Ideally you want a finish you can wipe over when needed. If you’re in doubt and have your heart set on a particular finish, try lightly staining a sample. Then try getting the dirt out.
Remember this becomes much more difficult when it’s actually above your head, if a quick wipe with a damp cloth doesn’t do it, then you’re going to need to reserve a lot of time for thorough cleaning.
Durability
Don’t waste your time, money and effort. Make sure that your going to be able to get years out of your new RV ceiling. Whereas some fabrics pill and stain easily, materials like metal and vinyl are extremely hard wearing.
Given that sooner or later, skylights have a tendency to develop micro-cracks and leak, you need to thoroughly consider your options.
While fabric and plywood are often considered as traditionally durable options, in this scenario they would have a much shorter lifespan than a waterproof PVC ceiling.
Fire Resistant
Safety first! Always check the fire safety rating of any material you’re thinking of using in your RV. This cannot be stressed enough.
Even if you do not have any naked flames, you need to protect yourself and your possessions. Check with your insurance provider before making any major changes to your RV.
You want to make sure that you remain covered in case of any damage that could have possibly been exacerbated by changes that you’ve made.
Installation
You may have found your perfect RV ceiling material, but can you fit it? Are you stuck between a choice of two?
Take my advice, go for the one that’s easiest to fit. You’re going to be looking at this ceiling everyday in some cases. Everyone you invite over is going to see it.
Why make a job more complicated than it needs to be? Don’t underestimate the difficulty of fitting an RV ceiling, especially if DIY is not really something you’re good at.
Enlist the help of a friend or partner and plan your installation rigorously. You don’t want to stop and mess things up halfway through.
RV Ceiling Installation Accessories
As promised, here’s my list of accessories you’re going to need to make a success of your RV ceiling renovation project. As with any task, make sure you have everything you’re going to need to hand, before getting started.
Construction Adhesive

You’re going to need plenty of adhesive. Using a high-quality, branded product guarantees long-lasting results.
I’m a firm Loctite fan and the Loctite PU Construction Adhesive is my go-to adhesive of choice. It bonds almost any surface and it’s waterproof and paintable.
You can use it in both hot and cold environments and in my experience it bonds much better than many other adhesives out there that I’ve tried. If you’re going to be using adhesive on your RV ceiling, this is the one to use.
Caulking Gun

A caulking gun is an absolute essential. Do not start your renovation without making sure you’ve got an easy to use, reliable caulking gun.
If it’s not in regular use, dig it out before you get started, or else pick one up now rather than wasting time later on down the line. I’ve had this caulking gun for quite some time now. It’s durable, has a comfortable grip and is still going strong.
KILZ Primer

Using a primer will make painting much easier, providing better adhesion and blocking out any stains. If you’re going to go to the trouble of painting your ceiling, you should take the time to prime the surface first.
You just can’t beat KILZ MAX Primer. This must-use primer helps to block stains and seals out food, smoke and pet odors. I’ve used this product several times now on various jobs and I cannot recommend it enough. Dries in just 30 minutes too, so no excuses.
Semi-Gloss Paint

Looking for a durable, superior-quality paint? Don’t go to all the trouble of painting without using the best. Rust-Oleum Marine Topside Paint is a class apart and perfect for painting fiberglass, wood or metal RV ceilings. I have had excellent results with this product and I seriously cannot recommend it enough.
Roller

Don’ struggle your way through the job, if you’re going to be painting, make sure that you have a decent roller with spare naps.
Don’t underestimate your RV ceiling renovation project, once you’ve got so far do you really want to start messing about with old shedding rollers and worn out paint brushes?
Get the job off to a smooth finish with this roller and paint tray brush set by Bates. It’s good quality and has everything you’ll need to get a great finish.
Summary
I hope this guide has helped you to make that all important choice of RV ceiling material.
In case you’re wondering, I went with PVC tiles for my Winnebago ceiling renovation. They weren’t my first choice initially, but I had a good, hard think about my priorities and they’ve worked out great.
I’m really happy with my choice and most importantly for me, they’re easy to clean and super durable.
If you’re still stuck deciding, remember, take your time and think things through before committing. Choose your camper ceiling material with care, it’s going to be a decision that, hopefully, you won’t need to make again anytime soon. So make sure you get it right from the start.
Happy renovating!
Thank you for reminding to always use only fire-resistant materials that your insurance would cover every time you get your RV repaired even if you don’t any live flames inside your truck. This is what Uncle Charles ought to keep in mind, especially since he would veritably be living in an RV when he begins crossing states for his live performances. He wouldn’t want flammable materials introduced into his RV that could endanger both life and property risking his policy coverage.
One of those features that bring the best out of recreational vehicles is the ceiling. Apart from the beauty they offer, they are also great when it comes to temperature regulation in case you are camping in a relatively hot environment. It doesn’t require much to give your RV’s interior a desirable look in the form of the ceiling, therefore, make sure that RV looks awesome by using the best material for RV ceiling.
You might use any of these mentioned materials but without any little creativity, you’ll never like the end result. You should, therefore, strive to stand out among other RV owners by going the extra mile to include some new features onto your design. A little paintwork will also make the ceiling better.
Vellisjr@aol.com
I wish you would put before and after photos using the products you suggested. It would also be nice to see pictures during the installation.
Thank you.
V. Ellis
Mobile, AL.